
Ringside Boxing Report: Martin Power – Ian Napa
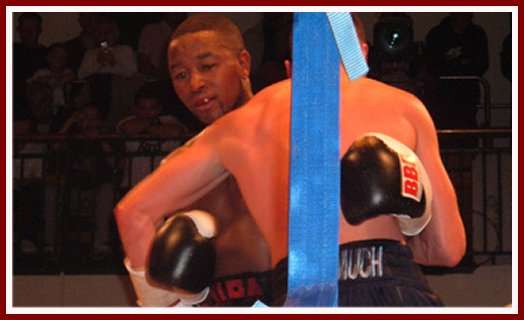
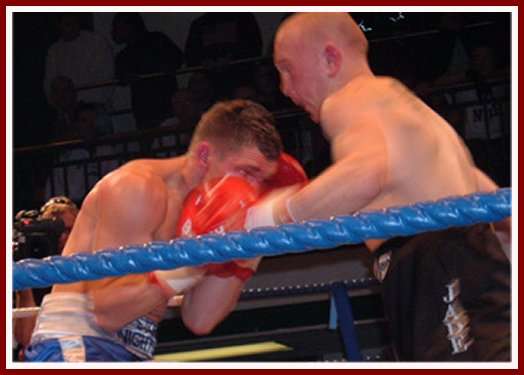
| Maloney Promotions put on a superb night at the fights on Friday, staging Martin Power’s British Bantamweight title defense against sharply skilled challenger Ian Napa at London’s historic fight venue, York Hall. Power came into the bout unblemished in seventeen contests while Napa had only come up short in three title fights and vowed to put an end to the Londoner’s championship reign. Sky Sports broadcast the action live in the UK. |  Click for larger image © Simon Shaw Saddoboxing.com |
Round One: The first starts slow with not many punches coming from either fighter. Power gets in a good right hand lead to the head of Napa and a nice right to the body. Power wins the round by landing the majority of the very few punches that were thrown.
Round: Power 10-9
Round Two: Not many jabs being thrown in round two. Napa catches Power with two good right hands. Power comes back with a left hook and right hand of his own. Napa shows some good defensive technique, as his shoulder rolls deflect Power’s hard right hands. An even round.
Round: Even 10-10
Fight: Power 20-19

|

|
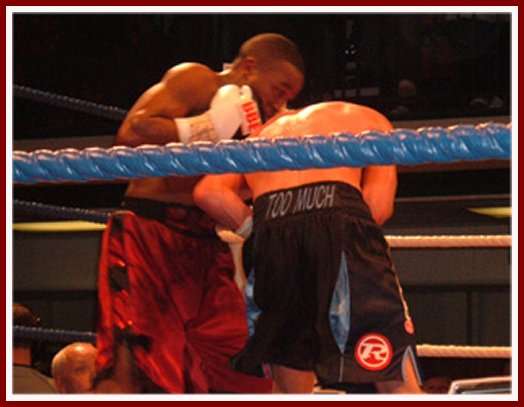
Round Three: This is where the fight starts warming up. Napa bullies Power against the ropes and lands a good left hook. This seems to anger Power a bit and the British Champion comes back with a flurry of hooks mostly blocked and dodged by Napa. Both fighters are choosing to stand their ground and trade on the inside with Power getting the better of most of the exchanges.
Round: Power 10-9
Fight: Power 30-28
|
|
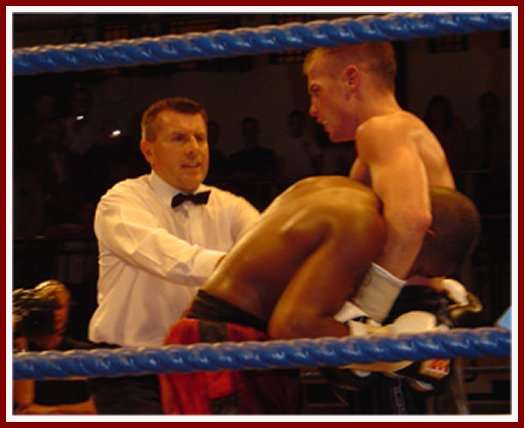
Round Four: As the fighters come out and meet in the middle of the ring, Power’s first punch of the round, a stiff left jab, snaps Napa’s head back. Napa is starting to use a few more body shots. Both fighters get a warning from referee Marcus McDonnell for use of the head. Power lands the cleaner shots in this round and looks like he’s starting to take over.
Round: Power 10- 9
Fight: Power 40-37

|

|
Round Five: The cleaner work is still coming from Power as he gets a good left hook in early. A few good right hands follow from Power. Napa is ducking low to avoid a lot of the shots coming his way. Power backs him into a corner and opens up, but Napa’s good defensive skills are keeping him out of harms way. Both fighters had their moments but the champion takes the round.
Round: Power 10- 9
Fight: Power 50-46
|

|
Round Six: Power’s right cross is starting to find the target with a bit more regularity. Napa comes back with a good overhand right of his own. A fight breaks out in the crowd, causing each fighter to be sent to a neutral corner until the distraction is dealt with. The altercation doesn’t seem to affect the fighters who both carry on from where they left off. Another round for Power.
Round: Power 10- 9
Fight: Power 60-55

|
|
Round Seven: Power opens the round with a good right cross and upper cut on the inside. Napa opens up with a short flurry of punches and pushes Power back to the ropes. The cheers from the hometown crowed suggesting that Power landed every time he threw a punch may have swung the judges his way a little but Napa out worked him in this round.
Round: Napa 10-9
Fight: Power 69-65

|
|
Round Eight: It’s Napa’s turn to open the round with a hard overhand right. A looping uppercut from Power sends a spray of sweat from Napa’s head. Power comes forward with a left hook and follows that up with a good combo. Napa takes a step back and reminds Power that he’s here to fight with a hard left hook of his
own. Power catches Napa with quick right cross but the Zimbabwean shakes his head to show it didn’t hurt. A good back and forth round. Napa walks back to the corner with a swollen left eye.
Round: Even 10-10
Fight: Power 79-75

|

|
Round Nine: An exciting round as both fighters electing to stand their ground and throw hard punches. A double left hook from Napa, an uppercut by Power before Napa lands a short right hand that pushes Power onto the ropes. Napa leans in straight away with the best punch of the fight, a hard overhand right that has Power in trouble. Power’s body sags as he’s momentarily stunned and this prompts Napa to open up with a flurry of hooks, sending Power into the corner. A few more right hands land on Power’s gloves as Napa tries to bring the show to a close. Power’s head clears quickly as he starts throwing punches back towards the end of round nine.
Round: Napa 10- 9
Fight: Power 88-85

|

|
Round Ten: Power starts the round cautiously on the back foot as Napa, with a bit more confidence from the last round, comes forward looking to land another big right. Power shoots in a good left hook and a sharp right hand at mid round. Napa drops his hand and gives another smile to show it didn’t hurt. Not much to separate the two in this round.
Round: Even 10-10
Fight: Power 98-95
Round Eleven: Napa opens the round with a good left hook, getting a bit messy as both fighters start to tire. Another warning to both fighters for use of the head. Power lands a good right cross that has Napa wanting to hold for a second. Both carry on banging away shots at each other’s head. A warning to Power for pushing Napa down. Another exciting round but Napa is the busier man in the eleventh.
Round: Napa 10-9
Fight: Power 107-105
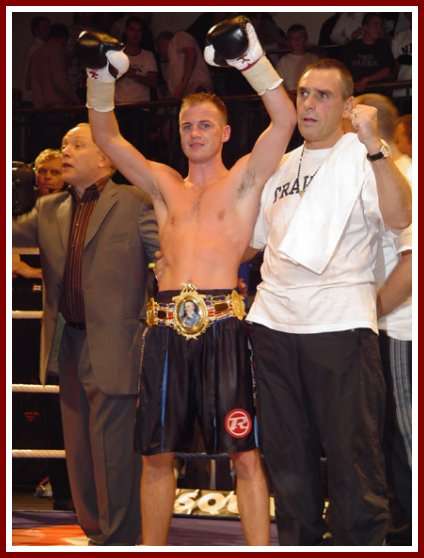
Round Twelve: A tremendous round. Both unsure of what way the judges are leaning so they come out swinging. Power throws two left hooks that connect. Napa coming straight back with a left hook-right hand combination. Power lands a very hard right cross which stops Napa in his tracks, producing what looks like a turn of events. Power tries to capitalize and opens up with a flurry of punches. Napa still not wanting to give ground lands a left hook that now sends Power back. The final bells goes and Power raises his hands claiming to be the victor.
Round: Power 10-9
Fight: Power 117-114
Boos unfairly erupt from the crowed as the announcer announces a split decision. The scores read as follows; Ritchie Davies 116-113 Power, John Keane 116-113 Napa. Ian John-Lewis 116-113 Power.
Saddoboxing scored the bout 117-114 in favour of Martin Power.
Martin Power keeps the British Bantamweight title belt around his waist by a split decision and moves to 18-0 (7) while Ian Napa loses his fourth title fight to fall to 12-4 (0).